You know what is ugly? Big blocks in dark parts of your pictures showing up especially nasty on bright screens. You can limit this very easy in cameraRAW or lightroom. With this tutorial you will become a master of the shadows!
Okay, so what a lot of people want to do is to deliberately underexpose their urban exploration pictures because it adds to the atmosphere. I agree. It does. But often times when they do it, they forget about the darks in their images. You can end up with a very nice picture with a lot of detail-loss in the shadows and darkest parts of the image. Not good. So how do you deal with this? Very easy.
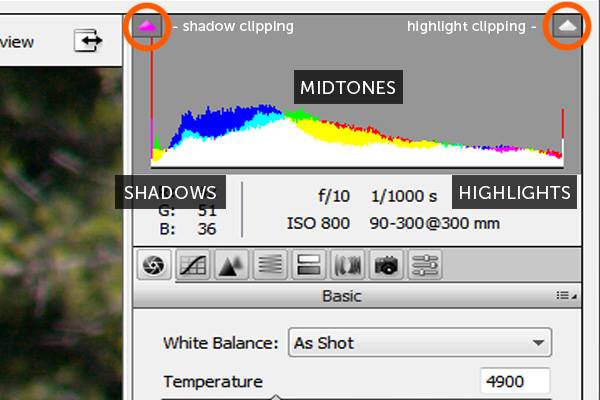
Okay what you are looking at here is the histogram in Adobe Camera Raw. You see shadow clipping and highlight clipping on both the top left and top right of this histogram. Click both of these in order to activate them. What they do is nothing more than simply adding an overlay on your photo. Blue where it is too dark and red where it is too light. Blue or red — it doesn’t matter you should try to get rid of both of these overlays in order to retain perfect details in your shadows and in your highlights. So to get rid of the blue overlay you adjust the shadows and the blacks and in order to get rid of the red overlay — you guessed it — you play around with the highlights and the whites sliders.
Another plus for Adobe CameraRAW is that you can stack CameraRAW filters on your picture. So if you need to do this 10 times you can keep stacking 10 Adobe CameraRAW filters.
Good luck and beware of blocky pixels in the dark areas of your image! Get rid of them by using a simple CameraRAW feature.